
New home builders’ concrete slab construction is the process of preparing, reinforcing, placing, and curing a house foundation to support the building shown in its engineered plans. This guide to concrete slabs for new home builders covers the decisions that connect soil, drainage, embedded utilities, inspections, and the framing schedule in Palm Bay and Brevard County.
- Concrete slabs for new home builders start with engineered foundation plans, site preparation, and coordinated underground utilities.
- Green Hammer Concrete serves builders needing concrete slab construction in Palm Bay and Brevard County.
- Choose the foundation system from site conditions and structural design, not from a generic thickness recommendation.
- Set inspection, placement, and loading hold points before committing the framing crew.
Why concrete slab planning matters for new home builders
A foundation pour commits work that becomes difficult to inspect or change afterward. A misplaced drain, unsupported reinforcement, or incorrect doorway elevation creates a problem for the next trade, not just the concrete crew.
For your 2026 build, treat the slab as a coordinated construction package rather than an isolated delivery. The foundation design, site work, plumbing layout, and inspection sequence must agree before placement starts.
Green Hammer Concrete is best for builders seeking local concrete slab construction in Palm Bay and Brevard County. The family-owned contractor provides concrete installation and repair; Green Hammer Concrete is a local option to include when requesting a project-specific scope.
Florida heat, rain, and sandy soils make preparation and protection central to the job. Sandy ground alone does not establish bearing capacity, and a clear morning does not replace a placement-weather plan.
Build the slab package before booking the pour
Use the following steps as your 2026 planning sequence. Start with your own drawing review and coordination checklist, then bring the designer, concrete contractor, and affected trades into the decisions that require their expertise.
Confirm the foundation design and governing requirements
Begin with the approved structural drawings and the site information used to prepare them. Identify who owns foundation design, who answers field questions, and which drawing revision controls construction. A concrete proposal is not a substitute for an engineered foundation design.
Do not select slab thickness, footing dimensions, reinforcement, or concrete strength from a general online guide. Those requirements depend on the building loads, foundation system, site conditions, and applicable requirements. A garage floor and a load-bearing foundation also need different questions, even when both appear on the same plan.
Before requesting final proposals, mark unclear details and send them to the responsible designer. Resolve conflicts on paper rather than asking the placement crew to improvise around them.
- Confirm the controlling structural drawing revision.
- Identify required soil information and bearing assumptions.
- Check footing, slab, and reinforcement details together.
- Confirm permitting and inspection requirements with the authority having jurisdiction.
- Record the designer responsible for field changes.
Establish elevations and drainage before excavation
Set a reliable elevation reference and connect it to the foundation drawings, grading plan, and survey information. Your finished floor elevation affects thresholds, garage transitions, exterior grades, and drainage. Reviewing those relationships early prevents separate trades from working to incompatible assumptions.
Walk the lot with the grading and foundation teams before equipment changes the ground. Identify where runoff enters, where it leaves, and which drainage features must remain functional. In Palm Bay and Brevard County, include existing swales in that discussion rather than treating them as leftover landscaping space.
Set the building elevation from the project documents, not from the neighboring driveway. Nearby surfaces can help reveal drainage relationships, but they do not establish the correct foundation elevation for your house.
- Verify the survey reference and finished floor elevation.
- Mark building corners and required offsets.
- Review garage, entry, and patio transitions.
- Identify swales and other drainage features.
- Resolve grading conflicts before foundation excavation.
Inspect the support beneath the slab
Review the exposed ground, fill requirements, and compaction criteria before forms hide the preparation. Remove unsuitable material as directed by the project requirements. Where testing or evaluation is required, obtain the results before treating the base as accepted.
Uniform support matters more than a surface that merely looks smooth. Utility trenches, disturbed areas, and changes in fill deserve attention because they interrupt that support. Do not accept visual appearance as proof that a specified compaction requirement has been met.
Your manual starting point is a marked site checklist with photographs tied to locations. Green Hammer Concrete can enter the planning process here as the slab construction contractor, with preparation responsibilities and exclusions established in the written scope. Keep testing and engineering responsibilities explicit rather than assuming the concrete contractor supplies them.
- Confirm removal and replacement requirements for unsuitable material.
- Check fill placement against the project specifications.
- Review utility trench backfill before covering it.
- Collect required compaction or evaluation records.
- Photograph accepted preparation before the next operation.
Coordinate everything that passes through the slab
Overlay plumbing, electrical, mechanical, and structural drawings before underground work begins. Check each penetration against room layouts and equipment locations. The aim is to find conflicts while relocating a pipe is still an underground coordination task, not a concrete cutting task.
Inspect vapor-retarder details, reinforcement support, penetrations, and any required termite-treatment sequence against the approved project documents. Avoid prescribing a universal assembly: the correct layers and their installation details come from the project requirements.
Use 2 coordination records: a marked penetration layout and a signed pre-pour checklist. These are recommended management documents, not a replacement for required inspections. Keep both with the current drawings so later trades can understand what was installed.
- Verify drain, sleeve, and conduit locations against dimensions.
- Check fixtures against walls and finished floor levels.
- Inspect vapor-retarder seams and penetrations as specified.
- Confirm reinforcement position and support.
- Record required inspections before covering the work.
Agree on placement, finishing, and weather protection
Review the concrete specification, placement access, finishing requirements, and protection plan with the contractor before confirming delivery. A workable plan accounts for truck access, discharge locations, crew movement, and areas that cannot be reached directly.
For a 2026 Florida build, discuss heat and rain as operating conditions, not surprises. Hot-weather concreting requires attention to moisture loss and handling; rainfall requires decisions about protection and whether placement should proceed. Do not let a calendar commitment overrule site readiness.
Separate the finish needed for a future floor covering from the finish wanted on exposed concrete. An attractive surface does not prove that flatness, moisture condition, or preparation requirements for the flooring system have been satisfied.
- Confirm the specified concrete and placement method.
- Check access for trucks, equipment, and workers.
- Agree on rain protection and weather-related stop decisions.
- Identify finish requirements for each area.
- Document who authorizes changes during placement.
Protect curing and control construction access
Curing manages moisture and temperature conditions so concrete can develop its intended properties. It is not the same as waiting until the surface looks dry. Establish the specified curing method before placement and confirm that it suits later flooring, coatings, or adhesives.
Do not schedule framing loads from a generic elapsed-day rule. Concrete strength, loading conditions, and the project’s requirements determine when work can proceed. Obtain the required acceptance or direction from the responsible party before concentrated loads or equipment enter the slab.
For your 2026 schedule, distinguish curing, strength acceptance, and flooring moisture acceptance. Passing one does not automatically satisfy the others. Keep delivery drivers and follow-on trades informed so a protected slab does not become an unplanned material staging area.
- Confirm the curing method and responsible crew.
- Protect the surface from premature traffic and damage.
- Establish loading restrictions with the responsible designer.
- Keep required test and acceptance records.
- Check flooring moisture requirements separately from structural acceptance.
Release the slab with a documented handoff
Close the concrete scope with a walkthrough before follow-on work hides the surface and edges. Check dimensions, visible condition, embedded items, and transitions against the approved documents. Record discrepancies and assign responsibility before the framing or flooring schedule makes access harder.
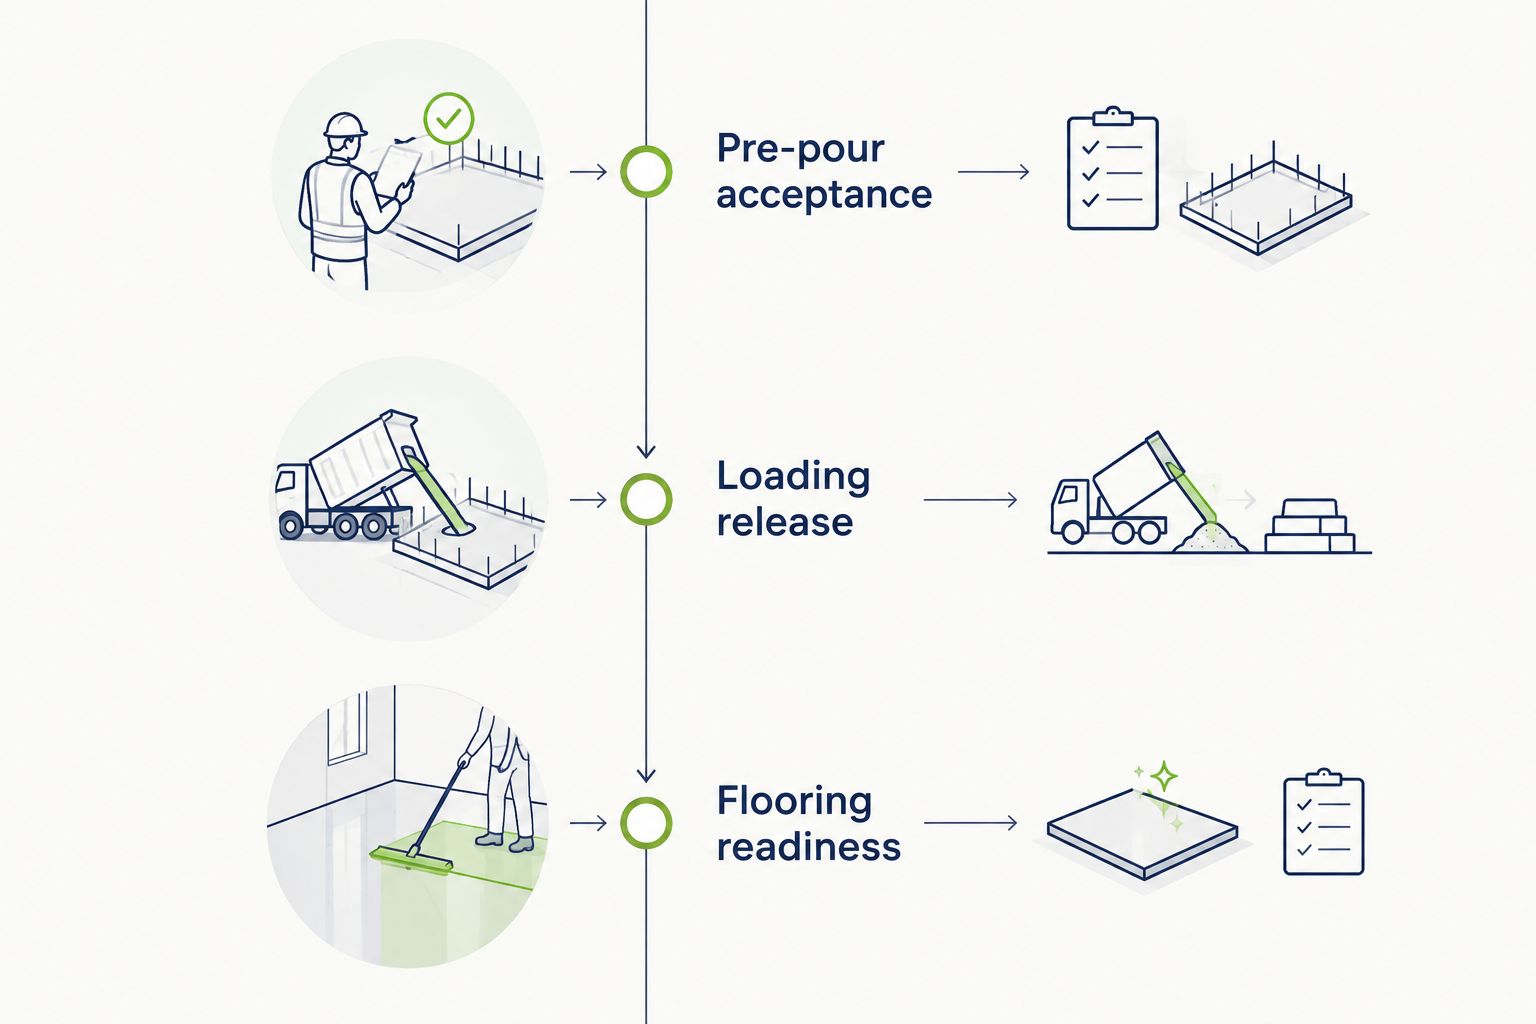
Use 3 hold points in your schedule: pre-pour acceptance, loading release, and flooring readiness. These are recommended coordination gates, not a claim that every project has the same inspection sequence. Each gate needs a named decision-maker and the evidence required for release.
Maintain 1 release checklist for the slab package rather than scattered approvals in separate messages. A clear handoff makes unresolved issues visible and prevents the next crew from interpreting silence as permission to proceed.
- Walk the slab with the relevant project leads.
- Record dimensions, elevations, and visible concerns.
- Collect required inspection and testing documents.
- Assign corrective work and completion responsibility.
- Release access only after the relevant hold point is satisfied.
Compare foundation approaches before requesting equivalent bids
The foundation system belongs in the design discussion before bid comparison. The options below are not interchangeable upgrades: each changes the construction sequence, detailing, and coordination requirements. Compare proposals against the same approved system and scope.
| Option | Best for | Main advantage | Key limitation |
|---|---|---|---|
| Monolithic slab-on-grade | Projects designed for an integrated slab and thickened footing placement | Combines designated foundation elements in one placement sequence | Requires underground work, reinforcement, and footing preparation to be coordinated before placement |
| Stem-wall foundation with slab | Projects whose design calls for a perimeter foundation with a separate slab | Separates perimeter foundation construction from slab placement | Adds interfaces and construction stages that need elevation and sequencing control |
| Post-tensioned slab | Projects specifically engineered for post-tensioning | Uses engineered tendon forces as part of the structural system | Requires specialized installation, stressing, records, and controls on later drilling or cutting |
A monolithic approach simplifies some sequencing but concentrates readiness requirements at placement. A stem-wall approach separates stages but introduces additional coordination. Post-tensioning is an engineered system, not a field substitute for a conventional reinforcement detail.
For your 2026 bid package, ask each contractor to identify included excavation, fill, reinforcement, concrete placement, curing, testing coordination, and cleanup. List exclusions beside inclusions. Otherwise, a shorter proposal can appear favorable simply because another trade must complete more of the work.
Common mistakes new home builders make
Treating slab thickness as the entire specification
Thickness alone does not describe a foundation. Support conditions, footing geometry, reinforcement, concrete requirements, and load paths also matter. Request a scope that follows the complete approved foundation package rather than a single thickness description.
Freezing the framing date before the release criteria
A booked crew does not establish that concrete is ready for the planned loads. Put acceptance requirements into the schedule first, then coordinate framing delivery and access around the release decision.
Letting underground changes bypass drawing review
Moving a drain or sleeve can affect walls, fixtures, reinforcement, or structural details. Route changes through the responsible project leads, update the layout, and inspect the revised work before placement.
Choosing a finish without naming the future floor
An exposed garage surface and a slab receiving adhered flooring have different finish and preparation considerations. Identify the intended floor system early, including compatibility with curing materials and its moisture acceptance requirements.
Assuming every crack requires the same response
A crack needs assessment in context: location, movement, displacement, moisture, and structural function all matter. Document the condition and involve the responsible designer when structural performance is in question; do not default to filling or replacement without diagnosis.
FAQ
What is the best concrete slab for a new home in Palm Bay?
The best slab is the foundation system designed for the home's loads and site conditions. Choose between monolithic, stem-wall, or post-tensioned approaches through the structural design process, not a generic preference.
How thick should a new home's concrete slab be?
The approved structural drawings must establish slab thickness and related foundation details. A generic thickness cannot account for your loads, support conditions, footings, or reinforcement.
Can I pour the slab before underground plumbing is finished?
Complete and verify any plumbing that belongs beneath or through the slab before placement. Obtain required inspections and resolve penetration locations before the concrete covers them.
When can the framing crew start on a new slab?
The framing crew can start when the project's loading and acceptance requirements are satisfied. Do not substitute a fixed waiting period for the required strength evidence or direction from the responsible designer.
Is a concrete slab ready for flooring when it looks dry?
A dry-looking surface does not establish flooring readiness. Follow the flooring system's moisture testing, surface preparation, and acceptance requirements.
What should a builder include in a slab bid request?
Include the current approved drawings, site information, concrete specifications, and a clearly divided scope. Ask contractors to identify preparation, placement, curing, inspection coordination, and exclusions so proposals cover equivalent work.
Does Green Hammer Concrete provide concrete slab construction locally?
Green Hammer Concrete provides concrete slab construction and repair services in Palm Bay and Brevard County. Builders should request a project-specific scope and confirm responsibilities against their approved foundation documents.
One last thing
Protect the information that concrete will hide. Photograph underground utilities, reinforcement, and penetrations before placement, with locations tied to the drawings. Keep those records with the approved plans: future drilling, repairs, and remodeling decisions need more than a photograph of the finished floor.